반응형
import SwiftUI

struct WheatherView: View {
    var body: some View {
        HStack {
            DayForecast(day: "Mon")

            DayForecast(day: "Tue")
        }
    }
}

#Preview {
    WheatherView()
}

struct DayForecast: View {
        //name
             //type
    let day: String

    var body: some View {
        VStack {
            Text(day)
            Image(systemName: "sun.max.fill")
                .foregroundStyle(Color.yellow)
            Text("High: 70")
            Text("Low: 50")
        }
        .padding()
    }
}


import SwiftUI

struct WheatherView: View {
    var body: some View {
        HStack {
            DayForecast(day: "Mon", high: 70, low: 50)

            DayForecast(day: "Tue", high: 60, low: 40)
        }
    }
}

#Preview {
    WheatherView()
}

struct DayForecast: View {
    //name
    //type
    let day: String
    let high: Int
    let low: Int

    var body: some View {
        VStack {
            Text(day)
            Image(systemName: "sun.max.fill")
                .foregroundStyle(Color.yellow)
            Text("High: \(high)")
            Text("Low: \(low)")
        }
        .padding()
    }
}
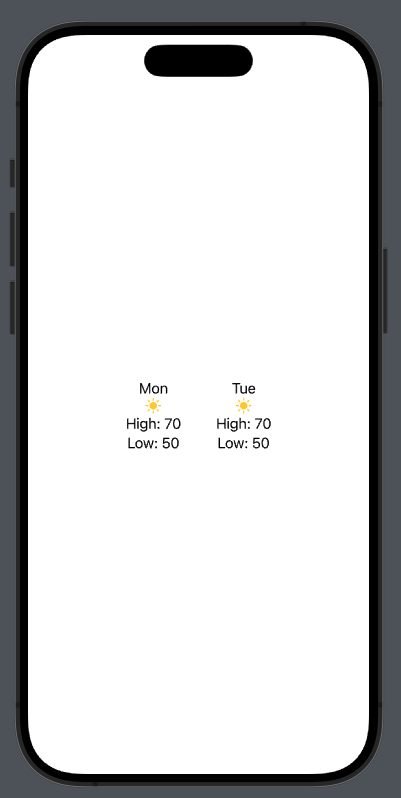
import SwiftUI

struct WheatherView: View {
    var body: some View {
        HStack {
            DayForecast(day: "Mon", isRainy: false, high: 70, low: 50)

            DayForecast(day: "Tue", isRainy: true, high: 60, low: 40)
        }
    }
}

#Preview {
    WheatherView()
}

struct DayForecast: View {
        //name
            //type
    let day: String
    let isRainy: Bool
    let high: Int
    let low: Int
    var iconName: String {
        if isRainy {
            return "cloud.rain.fill"
        } else {
            return "sun.max.fill"
        }
    }
    var iconColor: Color {
        if isRainy {
            return Color.blue
        } else {
            return Color.yellow
        }
    }
    var body: some View {
        VStack {
            Text(day)
            Image(systemName: iconName)
                .foregroundStyle(iconColor)
            Text("High: \(high)")
            Text("Low: \(low)")
        }
        .padding()
    }
}
import SwiftUI

struct WelcomePage: View {
    var body: some View {
        VStack {
            RoundedRectangle(cornerRadius: 30)
                .frame(width: 150, height: 150, alignment: /*@START_MENU_TOKEN@*/.center/*@END_MENU_TOKEN@*/)
                .foregroundStyle(.tint)
            HStack {
                Text("Welcom to MyApp")
                    .font(.largeTitle)
                    .fontWeight(.semibold)
                    .border(.black, width: 1.5)
                Text("largeTitle")
                    .foregroundStyle(.blue)
            }
            HStack {
                Text("Welcom to MyApp")
                    .font(.title)
                    .border(.black, width: 1.5)
                Text("title")
                    .foregroundStyle(.blue)
            }
            HStack {
                Text("Welcom to MyApp")
                    .font(.title2)
                    .border(.black, width: 1.5)
                Text("title2")
                    .foregroundStyle(.blue)
            }
            HStack {
                Text("Welcom to MyApp")
                    .font(.title3)
                    .border(.black, width: 1.5)
                Text("title3")
                    .foregroundStyle(.blue)
            }
            HStack {
                Text("Welcom to MyApp")
                    .font(.headline)
                    .border(.black, width: 1.5)
                Text("headline")
                    .foregroundStyle(.blue)
            }
            HStack {
                Text("Welcom to MyApp")
                    .font(.subheadline)
                    .border(.black, width: 1.5)
                Text("subheadline")
                    .foregroundStyle(.blue)
            }
            HStack {
                Text("Welcom to MyApp")
                    .font(.body)
                    .border(.black, width: 1.5)
                Text("body")
                    .foregroundStyle(.blue)
            }
            HStack {
                Text("Welcom to MyApp")
                    .font(.callout)
                    .border(.black, width: 1.5)
                Text("callout")
                    .foregroundStyle(.blue)
            }
            HStack {
                Text("Welcom to MyApp")
                    .font(.footnote)
                    .border(.black, width: 1.5)
                Text("footnote")
                    .foregroundStyle(.blue)
            }
            HStack {
                Text("Welcom to MyApp")
                    .font(.caption)
                    .border(.black, width: 1.5)
                Text("caption")
                    .foregroundStyle(.blue)
            }
            HStack {
                Text("Welcom to MyApp")
                    .font(.caption2)
                    .border(.black, width: 1.5)
                Text("caption2")
                    .foregroundStyle(.blue)
            }
        }
        .border(.orange, width:1.5)
        .padding()
        .border(.purple, width: 1.5)

    }
}

#Preview {
    WelcomePage()
}

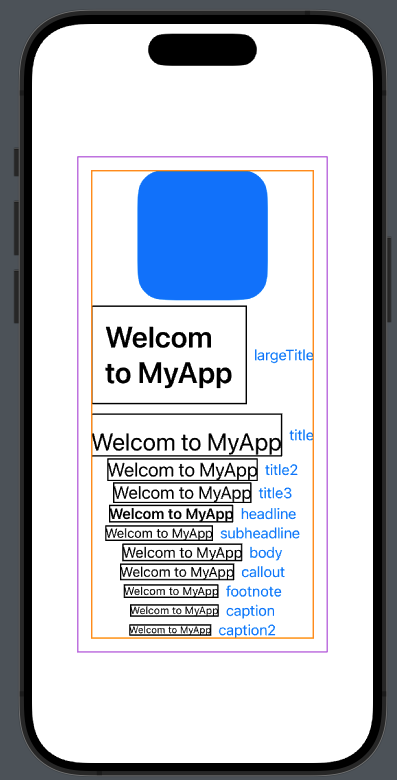
import SwiftUI

struct WelcomePage: View {
    var body: some View {
        VStack {
            RoundedRectangle(cornerRadius: 30)
                .frame(width: 150, height: 150, alignment: /*@START_MENU_TOKEN@*/.center/*@END_MENU_TOKEN@*/)
                .foregroundStyle(.tint)
            HStack {
                Text("Welcom to MyApp")
                    .font(.largeTitle)
                    .fontWeight(.semibold)
                    .padding()
                    .border(.black, width: 1.5)

                Text("largeTitle")
                    .foregroundStyle(.blue)
            }
            HStack {
                Text("Welcom to MyApp")
                    .font(.title)
                    .padding(.top)
                    .border(.black, width: 1.5)
                Text("title")
                    .foregroundStyle(.blue)
            }
            HStack {
                Text("Welcom to MyApp")
                    .font(.title2)
                    .border(.black, width: 1.5)
                Text("title2")
                    .foregroundStyle(.blue)
            }
            HStack {
                Text("Welcom to MyApp")
                    .font(.title3)
                    .border(.black, width: 1.5)
                Text("title3")
                    .foregroundStyle(.blue)
            }
            HStack {
                Text("Welcom to MyApp")
                    .font(.headline)
                    .border(.black, width: 1.5)
                Text("headline")
                    .foregroundStyle(.blue)
            }
            HStack {
                Text("Welcom to MyApp")
                    .font(.subheadline)
                    .border(.black, width: 1.5)
                Text("subheadline")
                    .foregroundStyle(.blue)
            }
            HStack {
                Text("Welcom to MyApp")
                    .font(.body)
                    .border(.black, width: 1.5)
                Text("body")
                    .foregroundStyle(.blue)
            }
            HStack {
                Text("Welcom to MyApp")
                    .font(.callout)
                    .border(.black, width: 1.5)
                Text("callout")
                    .foregroundStyle(.blue)
            }
            HStack {
                Text("Welcom to MyApp")
                    .font(.footnote)
                    .border(.black, width: 1.5)
                Text("footnote")
                    .foregroundStyle(.blue)
            }
            HStack {
                Text("Welcom to MyApp")
                    .font(.caption)
                    .border(.black, width: 1.5)
                Text("caption")
                    .foregroundStyle(.blue)
            }
            HStack {
                Text("Welcom to MyApp")
                    .font(.caption2)
                    .border(.black, width: 1.5)
                Text("caption2")
                    .foregroundStyle(.blue)
            }
        }
        .border(.orange, width:1.5)
        .padding()
        .border(.purple, width: 1.5)

    }
}

#Preview {
    WelcomePage()
}
import SwiftUI

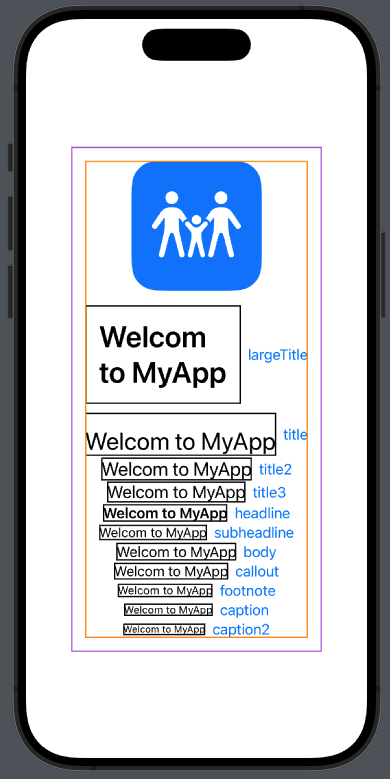
struct WelcomePage: View {
    var body: some View {
        VStack {
            ZStack {
                RoundedRectangle(cornerRadius: 30)
                    .frame(width: 150, height: 150, alignment: /*@START_MENU_TOKEN@*/.center/*@END_MENU_TOKEN@*/)
                    .foregroundStyle(.tint) //파란색


                Image(systemName: "figure.2.and.child.holdinghands")
                    .font(.system(size: 70))
                    .foregroundStyle(.white)
            }
            HStack {
                Text("Welcom to MyApp")
                    .font(.largeTitle)
                    .fontWeight(.semibold)
                    .padding()
                    .border(.black, width: 1.5)

                Text("largeTitle")
                    .foregroundStyle(.blue)
            }
            HStack {
                Text("Welcom to MyApp")
                    .font(.title)
                    .padding(.top)
                    .border(.black, width: 1.5)
                Text("title")
                    .foregroundStyle(.blue)
            }
            HStack {
                Text("Welcom to MyApp")
                    .font(.title2)
                    .border(.black, width: 1.5)
                Text("title2")
                    .foregroundStyle(.blue)
            }
            HStack {
                Text("Welcom to MyApp")
                    .font(.title3)
                    .border(.black, width: 1.5)
                Text("title3")
                    .foregroundStyle(.blue)
            }
            HStack {
                Text("Welcom to MyApp")
                    .font(.headline)
                    .border(.black, width: 1.5)
                Text("headline")
                    .foregroundStyle(.blue)
            }
            HStack {
                Text("Welcom to MyApp")
                    .font(.subheadline)
                    .border(.black, width: 1.5)
                Text("subheadline")
                    .foregroundStyle(.blue)
            }
            HStack {
                Text("Welcom to MyApp")
                    .font(.body)
                    .border(.black, width: 1.5)
                Text("body")
                    .foregroundStyle(.blue)
            }
            HStack {
                Text("Welcom to MyApp")
                    .font(.callout)
                    .border(.black, width: 1.5)
                Text("callout")
                    .foregroundStyle(.blue)
            }
            HStack {
                Text("Welcom to MyApp")
                    .font(.footnote)
                    .border(.black, width: 1.5)
                Text("footnote")
                    .foregroundStyle(.blue)
            }
            HStack {
                Text("Welcom to MyApp")
                    .font(.caption)
                    .border(.black, width: 1.5)
                Text("caption")
                    .foregroundStyle(.blue)
            }
            HStack {
                Text("Welcom to MyApp")
                    .font(.caption2)
                    .border(.black, width: 1.5)
                Text("caption2")
                    .foregroundStyle(.blue)
            }
        }
        .border(.orange, width:1.5)
        .padding()
        .border(.purple, width: 1.5)

    }
}

#Preview {
    WelcomePage()
}
import SwiftUI

struct FeatureCard: View {

    let iconName: String
    let description: String

    var body: some View {
        HStack {
            Image(systemName: iconName)
                .font(.largeTitle)
                .border(.mint, width: 2)
                .frame(width: 50)
                .border(.black, width: 5)
                .padding(.trailing, 10) //이미지 옆 공간 확보
                .border(.orange, width: 2)

            Text(description)
            //Spacer()는 자신이 속한 스택 내에서 가능한 모든 공간을 채움
            //이를 통해 다른 뷰들이 적절한 위치에 배치되도록 조정
            Spacer()
        }
        .padding()
        .background(.tint, in: RoundedRectangle(cornerRadius: 8))
        .foregroundStyle(.white)
    }
}

#Preview {
    FeatureCard(
        iconName: "person.2.crop.square.stack.fill",
        description: "A multiline description about a feature paired with the image on the left.")
}
import SwiftUI

struct FeaturesPage: View {
    var body: some View {
        VStack {
            Text("Features")
                .font(.title)
                .fontWeight(.semibold)
                .padding(.bottom)

            FeatureCard(
                iconName: "person.2.crop.square.stack.fill",
                description: "A multiline description about a feature paired with the image on the left.")

            FeatureCard(
                iconName: "quote.bubble.fill",
                description: "Short summary")
        }
        .padding()
    }
}

#Preview {
    FeaturesPage()
}
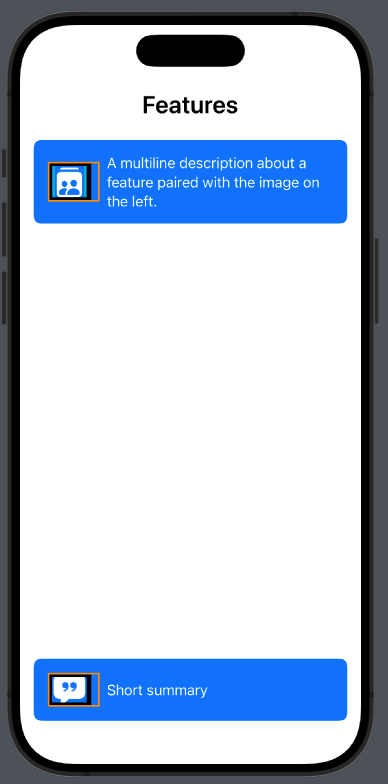
만약 카드 사이를 완전히 떨어뜨리고 싶다면?
Spacer()를 사용하는거구나 이해했다
import SwiftUI

struct GroupView: View {
    var body: some View {
        TabView {
            WelcomePage()
            FeaturesPage()
        }
        .tabViewStyle(.page)
    }
}

#Preview {
    GroupView()
}
탭뷰를 사용해서 좌우로 스와이프하면 뷰를 변경할 수가 있습니다

색상 변경하기
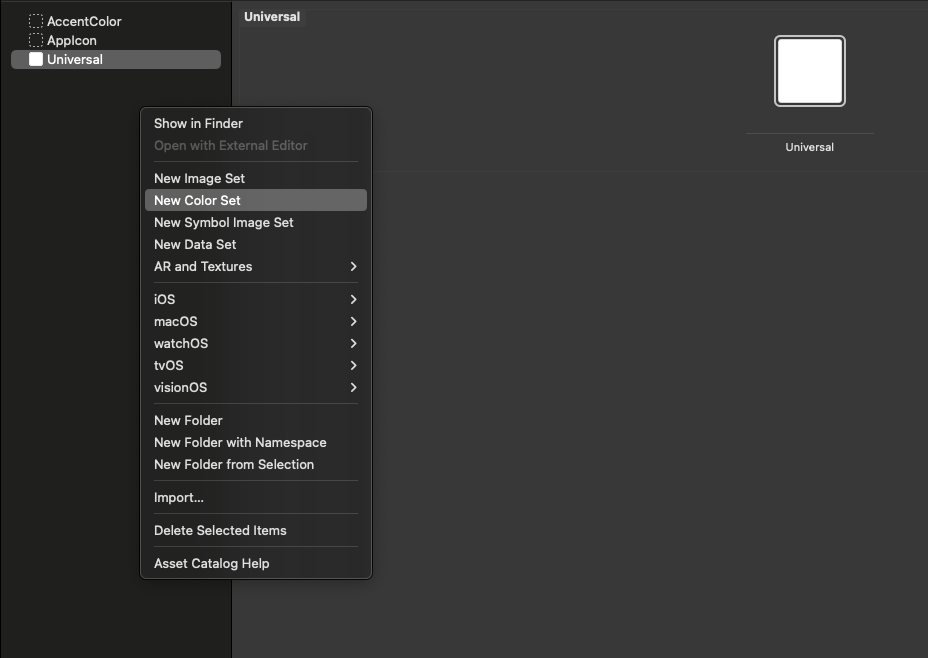
컬러셋을 만들고 난 후
우선 다크 라이트 애니 다양한 식으로 적용할 수 있습니다


두가지 색으로 Gradient를 만들고자 합니다
import SwiftUI

let gradientColor: [Color] = [
    .gradientTop,
    .gradientBottom
]

struct GroupView: View {
    var body: some View {
        TabView {
            WelcomePage()
            FeaturesPage()
        }
        .background(Gradient(colors: gradientColor))
        .tabViewStyle(.page)
    }
}

#Preview {
    GroupView()
}

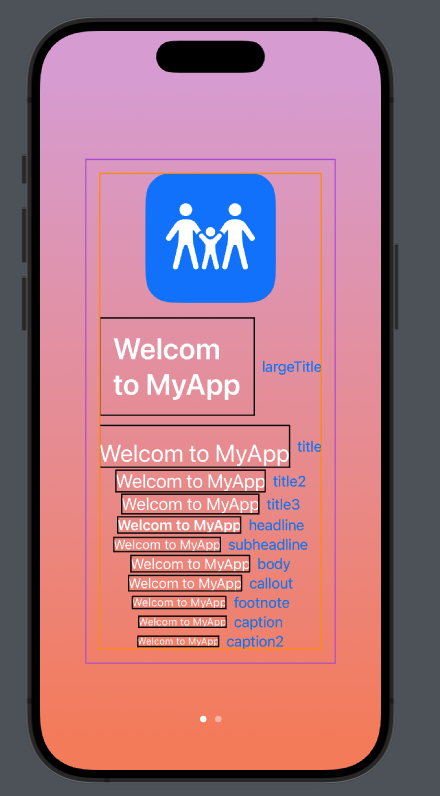
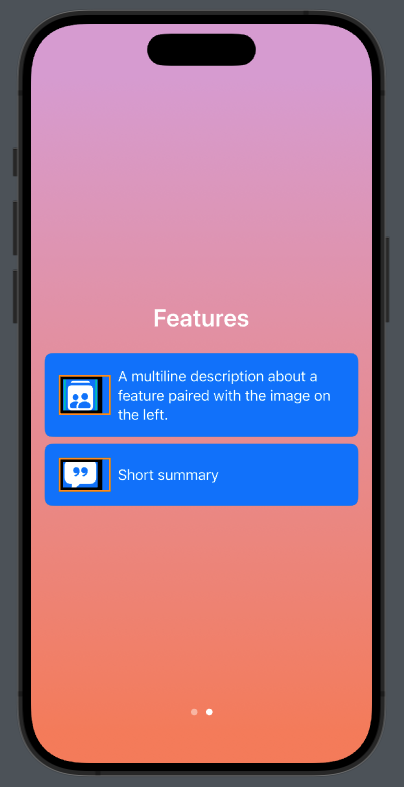
여기서 글씨를 모두 흰색으로 변경하고 싶다면

foregroundStyle을 지정해서 변경할 수 있습니다
기본 색상을 변경하고 싶다면?
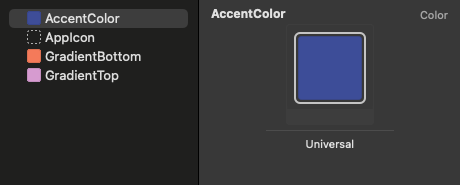
기본적으로 .tint 수식어는 앱의 AccentColor를 따르고 있는데
기본 색상은 SystemBlue이다
커스텀을 통해서 변경을하게되면
전반적으로 상호작용가능한
버튼, 토글, 링크 등 기본적으료 적용이된다

각 항목마다 여유 공간주기
spacing
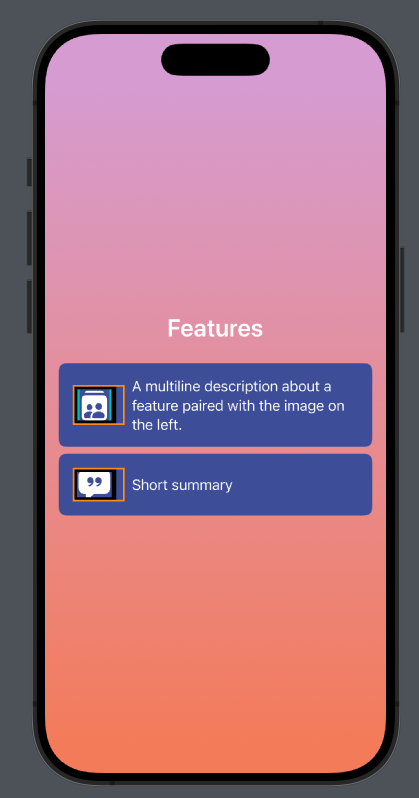
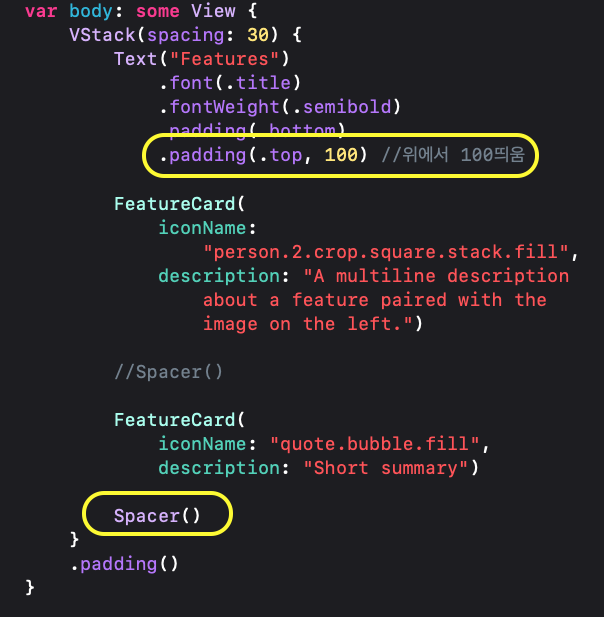
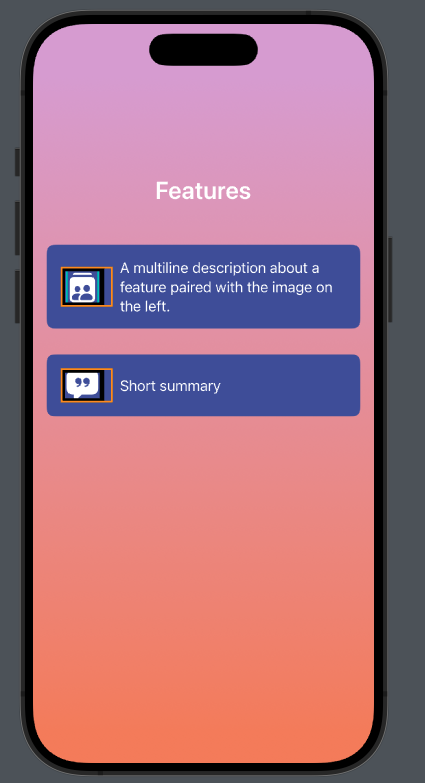
각 항목마다 지정 간격이나 정렬을 설정할 수 있습니다


30간격으로 띄워진것을 볼 수 있습니다
각 카드마다 불투명도 주기
      //.tint 수식어는 앱의 AccentColor를 따름
        //AccentColor는 앱의 전반적인 강조 색상으로 사용
        //상호작용 가능한 요소(버튼, 토글, 링크 등)에 기본적으로 적용
//        .background(.tint, in: RoundedRectangle(cornerRadius: 12))
        .background(content: {
            RoundedRectangle(cornerRadius: 12)
                .foregroundStyle(.tint) //accentColor == tint
                .opacity(0.25)  //투명도
                .brightness(-0.4) //뷰의 밝기 40% 어둡게(음수면 어둡게 양수는 밝게)
        })
        .foregroundStyle(.white)
    }

출처:
SwiftUI Tutorials
반응형
'SwiftUI' 카테고리의 다른 글
| SwiftUI | SwiftData Tutorials - List / NavigationStack / DatePicker (0) | 2024.08.08 |
|---|---|
| SwiftUI | 다양한 정렬 및 레이아웃(HStack / VStack / ZStack) (0) | 2024.08.07 |
| SwiftUI | Hello SwiftUI -1 (0) | 2024.08.07 |
| SwiftUI | Transcribing speech to text (0) | 2024.08.06 |
| SwiftUI | Examining data flow in Scrumdinger (0) | 2024.08.06 |